APC's tutorial on how to back up disk partitions before installing a new OS or dual-booting the existing OS.
Scenario: You're going to install Vista soon, or want to dual-boot it with XP or Linux. But instead of just backing up just the data, you want a disk image so that if anything goes wrong once you install Vista, you can quickly reinstall your previous OS, applications and data at once.
Tutorial summary: We'll create a Windows PreInstalled Environment disk with BartPE Builder, and use the DriveImage XML plugin for BartPE to do the backing up and restoring.
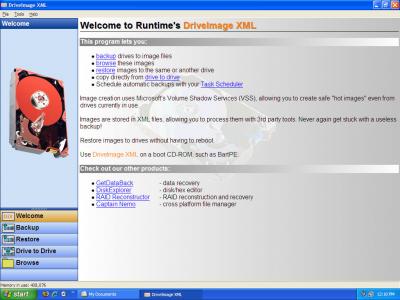
 DriveImage XML is a free tool which backs up your partitions
Why an image-based backup?
Before you look to resizing any partition though, you need to guarantee the safety of the existing data. While partitioning is straightforward, one mistake can result in hours of wasted time spent in recovering partition and file data.
The best backup option is an image-based solution. Traditional file
backups are very good and will certainly protect your data, but they
don’t have the ability to restore a failed system to its original
state. You’d have to rebuild from scratch and then restore data – very
time consuming.
Symantec Ghost is
the most well-known (and arguably the best) imaging product on the
market, but it’s not free. If you’re lucky enough to have a copy then
look no further, but otherwise we need a different solution.
There are quite a few open source and freeware imaging tools available for download, but the majority of them perform sector-based backups. This means that if you have an 80GB partition, you’ll get an 80GB image file, regardless of how much data is actually stored on that partition. Not only is this inflexible, but it starts to cause real problems with drives over 200GB, as you need that much free space on another drive. It’s also a problem when you go to perform a restore – an 80GB image file will restore to an 80GB partition, regardless of the size of the destination drive. So you can’t restore to a smaller drive, and a larger drive will just end up with an 80GB partition and a load of free (and wasted) space.
The best imaging tools are those that perform a used sector-based copy – the entire partition is scanned but only physical data is backed up – and can resize the destination partition during a restore.
One application we use which is an excellent choice for Windows systems is DriveImage XML.
Back up with DriveImage XML and BartPE
DriveImage XML leverages Microsoft Volume Shadow Service (VSS) technology, so it can only be installed on Windows XP Home, XP Professional or Server 2003, and just backs up and restores partitions formatted with FAT12, 16, 32 or NTFS.
So, it really is Windows-centric, but its use of VSS technology allows DriveImage XML to provide some very neat features. It performs used sector backups to a DAT file, but indexes the contents in an XML file which enables you to browse the DAT file and extract data from it, using either DriveImage XML or other third-party XML-compliant tools.
It’s an installed app, and can perform “hot image” backups - backing up the partition it’s installed on while Windows is still running. It can perform drive-to-drive backups, and can also be integrated with Task Scheduler to perform regular system snapshots. It can restore to the same partition without restarting the machine, and can also be integrated with Windows PE to run off a boot CD.
However, it cannot restore an image to the system partition, and for our purposes this is a problem. It’s a common enough imaging scenario though – you can’t overwrite a partition which the application is dependent on, even though it’s capable of backing up that same partition. To get around this dilemma we need to be able to access the partitions without loading the operating system, and this is where Windows PE comes in.
Windows Preinstall Environment (PE) is a stripped down version of Windows XP which can boot off a CD. The benefit of using it is that it supports all the system drivers that XP supports, and you can install as many applications as you like (assuming they fit on the CD).
Windows PE makes a great platform for diagnostic and imaging tools because you get full application functionality without having to touch the underlying system. Windows PE as a complete product isn’t generally available to end users, but you can extract all the necessary files to make a PE boot CD from the original Windows XP CD (needs SP1 or higher integrated into the CD).
Get started
Download BartPE Builder, a utility that can create a Windows Preinstall Environment. Also download the DriveImage XML plugin for BartPE Builder (driveimage_xml.cab). Get it by clicking here.
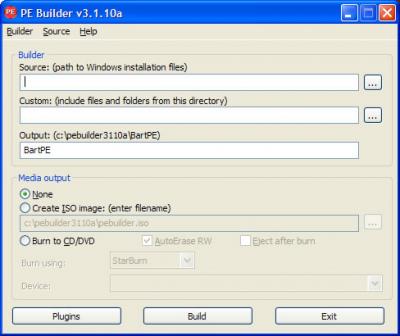
Launch BartPE builder.
Make sure the Windows XP CD is in the drive, then click the folder icon next to Source, and select the root drive (ie: D:\).
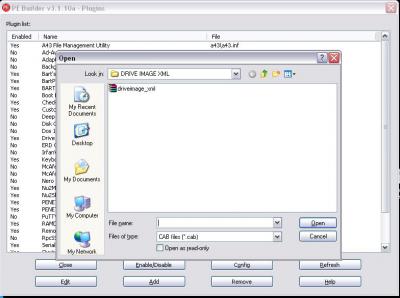
Then, click on Plugins and select Add. Navigate to the DriveImage XML plugin you download earlier (driveimage_xml.cab)and click Open.
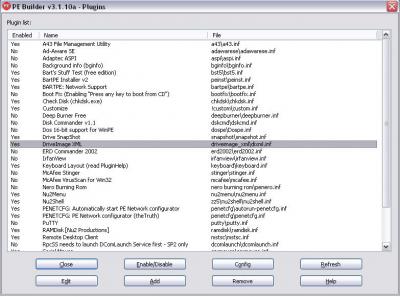
Accept the default folder name and now DriveImage XML should be in the plugin list, and enabled.
Also, go to the plugin called “RpcSS needed to launch DcomLaunch” if you’re using Windows XP SP2 and enable it – otherwise DISKPART will not work, and we may need that. Close the plugins screen.
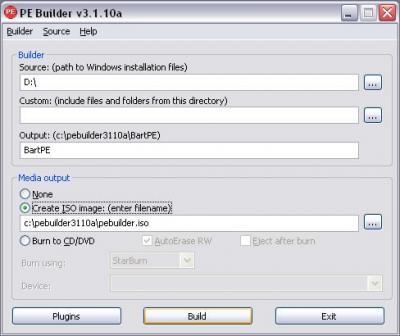
Change the media output to ISO and then select Build. PE Builder will extract all the necessary files from the XP CD. Once that’s done you can burn the ISO and you have a bootable PE CD with DriveImage XML ready to go.
If you’re planning to back up to an external drive, make sure it’s plugged in to the machine before you power it up. If you’re backing up to a network location, make sure that the machine is connected to a wired network (wireless is a lot trickier in Windows PE).
Now, restart the system and boot from the CD. When prompted to start network support, say Yes (if you need it). Choose DHCP if you have a DHCP service running on the local network, otherwise choose Manual and assign an IP address. In the PE Network Configurator, the most appropriate driver match for the network adaptor is chosen. Click on Network Drives and you can map a drive to the network location you’ll be backing up to. Close the screen down and click OK.
Click on GO, and go to Programs, DriveImage XML.
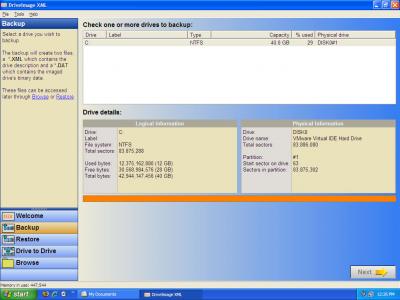
Click on Backup and you get a visual representation of the logical and physical disks on the system.
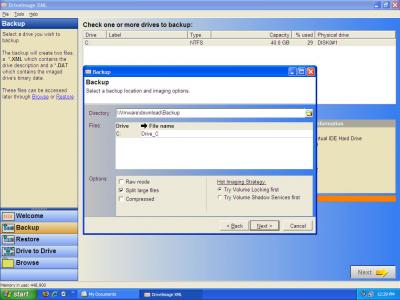
Click
Next again and then the folder icon next to the backup directory, then
browse to your remote storage area. By default the filename will be
Drive_letter (Drive_C) in our case – change this if you wish.
Under Options, make sure that “Raw mode” is unticked – this performs a sector-by-sector backup, resulting in an image file exactly the same size as the partition.
“Split large files” is designed to get around file size limitations of FAT partitions, but if you’re backing up to a FAT32 or NTFS partition (or any other partition which has no file size restrictions), or you’re not planning on burning the individual files to CD/DVD, then untick this option. Compression will decrease the size of the image by up to 40% but the backup will take longer.
As we’re backing up a live system, we have to use a Hot Imaging Strategy. Volume Locking is the default option – it basically revokes write access to every running application and process while the backup is running. This ensures that there’s no corruption caused by data change while the partition is backing up.
Using Volume Shadow Services means that DriveImage XML will use VSS to create a shadow copy, then back up the shadow copy and delete it afterwards. By default, DriveImage XML uses Volume Locking first, and then VSS should Volume Locking fail.
Click Next and the backup starts. The length of the backup depends on the amount of data to be backed up and connection speed to the storage area.
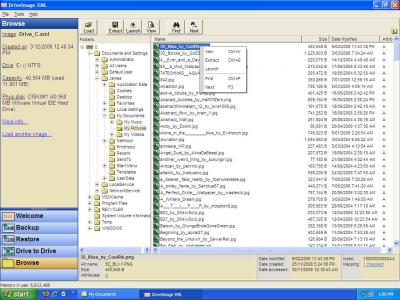
Click Browse and navigate to the XML file. This allows you to browse the contents of the DAT file and extract data.
To restore the backup image you have to have a partition to restore to. It doesn’t have to be formatted, as the restore process will erase and replace the file system, and if you want the partition to be bootable then it has to be marked as active. The standard Windows partition meets both these requirements, so restoring the image is very straightforward.
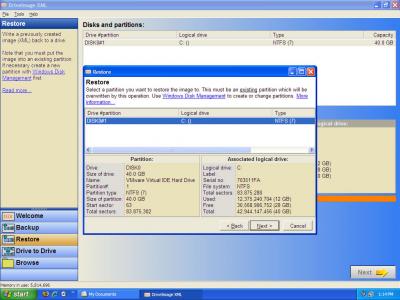
Click on Restore, then Next. Navigate to the XML file then highlight the partition with the logical C drive and click Next, then Next again. The wizard presents you with a warning message before continuing – type in the confirmation message and click OK. Once the restore is done, restart the system and it should boot up without any problems.
If you run into problems at any stage and the partition becomes corrupt, go to Go, System Storage, DiskPart – this loads DISKPART in a command window. Type in “LIST VOLUME” to get a volume listing. Based on the list, choose the problem volume by “SELECT VOLUME #”, where # is the volume number.
Then type in “DELETE VOLUME”. Check the physical disks on the system with “LIST DISK”, and then create a new partition with “CREATE PARTITION PRIMARY”. Now launch DriveImage XML and restore to the new partition, and all is well again.
Next
Now that you've backed up your partitions, go to: